5/31/13

Tale Of The Shell Video Game!


Check out the game I have been working on with my team Half Bit Studios at shool for the last 10 weeks. This game was created Using Unity 4.0 by 8 individuals. The text below will link you to the game and give you the synopsis of it as well.

Click here to get linked To Game page

My responsibilities in the game were Animations for the turtle Character, Environment Art, and Asset Art. We will be polishing the game possibly over the next 10 weeks and I will likely be picking up the role of a Technical Artist (Shaders, Advanced Baked Lighting)as well as my current duties! Can't wait!

5/26/13

Dragon Head Render (Images)

These are still images of the dragon head that I have been working on. This Dragon Head will go on a shield that I am making. Sculpting was done in Zbrush, Renders in Mudbox.


Dragon head Render


This is a render of a dragon head I have been working on that will be used on a shield that I am working on. The Dragon was sculpted in Zbrush, Rendered in Mudbox.

5/21/13

(Update) Futuristic Modular Environment Art

So I have been working more on my modular Environment Scene. The last couple of days, I have been building walls and doors and things of that nature. I optimized the first texture sheet as the walls had some pixel sizing issues. I remade the wall texture to be of a pixel density closer to the doors that I created. I also created a second texture sheet that is about 95% finished. I will more than likely cover up the cloudy dark areas with different window textures as my level will have those as well. i will end up needing another texture sheet that I will probably make later in the week for Alphas that will go on the walls and break up some of the tiling for the level. I have been taking the time to make sure that all of my pivots are lined up to the grid perfectly for these models so that they snap into place with no issues. The lower poly models should be finished soon.


Quick Anatomy Reference Sculpts

Going to start practicing anatomy sculpts here and there so I don't lose the skill. Some quick ones I did earlier today A mouth and nose that was referenced from Gargamel from the SMURF's and a eye anatomy sculpt as well.


5/15/13

Detailed Barrels

I have been working on these barrels the last couple of hours to enhance my skills. I created the barrels in 3DS Max and then from their, I went into Zbrush and sculpted in wood detail. I then extracted the normal map and created my base colors in Mudbox for the model. Then I went into Photoshop to create my Specular Map, My AO Map, then a cavity map from the normal. I used those in the barrels to make the detail of the wood pop much more and then took renders of it in 3DS Max.


Thanks to a friend I met on linkedIn, I will be working more on making my models appear more awesome from here on out. I have gained much insight from this individual before in the past and he has helped me see where I could use room for improvement! Critiques can be so helpful at times!

5/13/13

Modular Texture Sheet (Cavity Maps, AO Maps, Specular Maps, Detailed Texture Sheet)

Been working on my texture sheet more today. Since yesterday, I have created A normal Map, Specular Map, AO Map, And added a lot more detail to my texture sheet as shown below


Next I have to build my modular pieces for the environment

5/11/13

Modular Texture Sheet (Futuristic Scene)

This is a texture sheet I have been working on lately. It is a for a portfolio piece That i am making. The piece will focus on the use of Modular Environment Pieces and smart texture utilization. This texture sheet contains everything I feel I would need for the walls, ground, and ceiling. I am feeling out how the normal map should look for it now, This is what I currently have as well as a render on a cube


5/10/13

Platforms and Texture color matching

I made these platforms in about an hour yesterday using Zbrush for all of the rock detail then exported Normal maps from the High Poly to the Low poly using Mudbox. I brought in the Normals to Photoshop and created Ambient Occlusion maps from the normals to add deetail to the low polys for the platforms for this game since all of the detail is in the textures.

\\

The rock on the Texture Maps are a little bit darker than the terrain map since they will be over molten Lava, but the color map is basically exactly the same for these


5/7/13

Terrain Stamps for Mudbox


These are some Modular Stamps that I created for Mudbox that are free to use! I will attach a link to my deviant art page so that you can download them from their and use the page for the Stamps as a F.A.Q in case anyone happens to have issues installing them.

Link to page for Stamps


5/1/13

Terrain Stuff

This project I have been working on as of late has involved me incorporating Mudbox, Photoshop, Unity, and world Machine into my workflow. I first created a base terrain in 3ds Max and unwrapped it then imported it into Mudbox. From their, I created my basic shapes of the terrain and added slight detail going no higher than 4.5 million Polys.


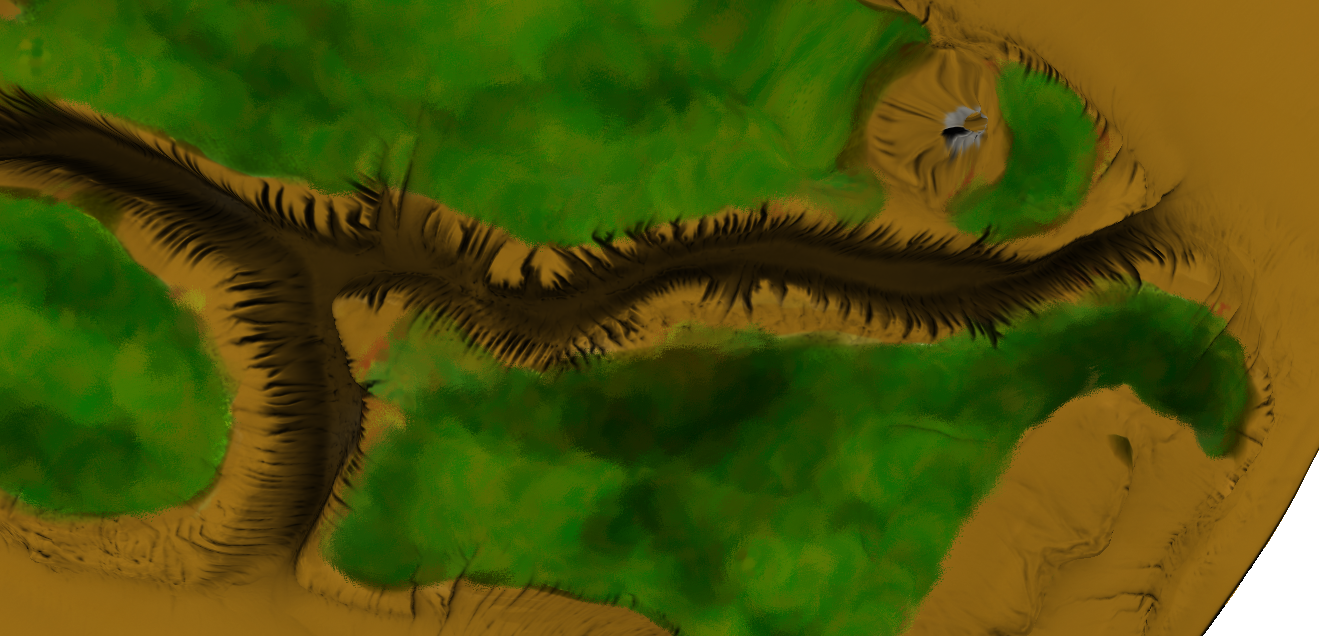
Once I was finished sculpting the terrain in Mudbox, I went on to extract a displacement map from mudbox and then bring it into World Machine to add detail and a BMP map to my terrain. playing around with the panels and downloading a macro off the world machine site gave me this


I baked out an ambient occlusion map, a light map, a diffuse map, and detail maps for the diffuse to incorporate later in mudbox/photoshop. Then I brought a height map in from world machine into Mudbox to continue sculpting, adding detail, and baking more maps. I also created my diffuse maps in Mudbox and messed around with the channels and layers to get a nice stylized texture going for the terrain.


Then I imported the heightmap I created in Mudbox back into WM and exported it out as a raw file to import into Unity. The texture I made for the terrain was exported from Mudbox to Unity.


The skybox created in the background was also custom made by me as well. I created that in mudbox by using a 1024x4096 map and painted a stylized cloud texture on the canvas and used a gradient on the background to make it appear as if the sky got brighter the higher it went up.